
The Movements That Build Everything
You do not need 200 exercises. You need 10 — and you need to do them well.
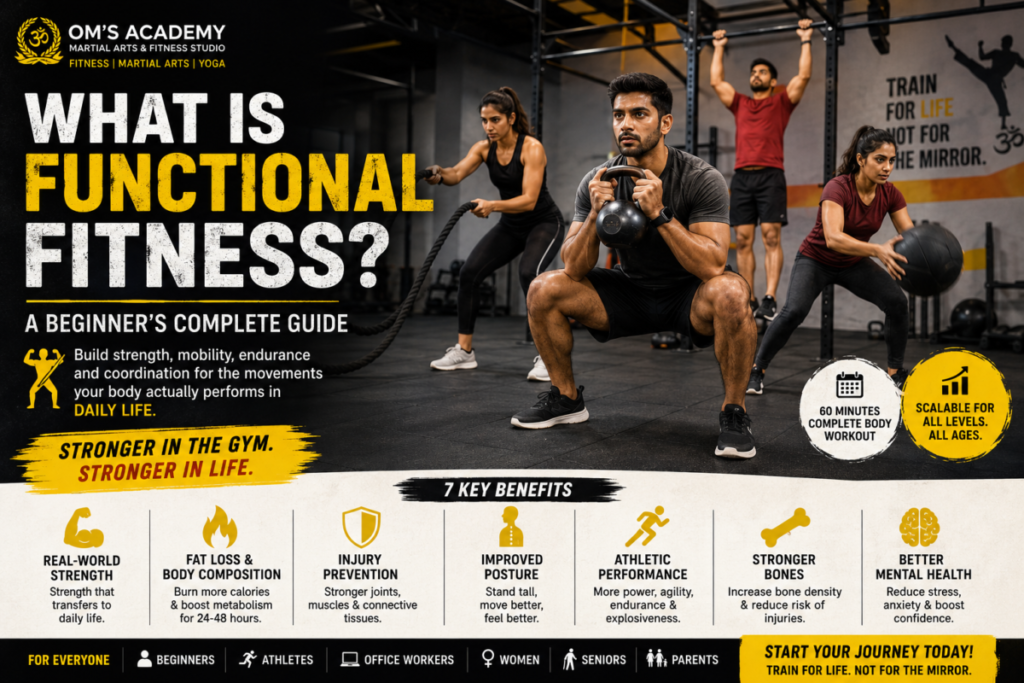
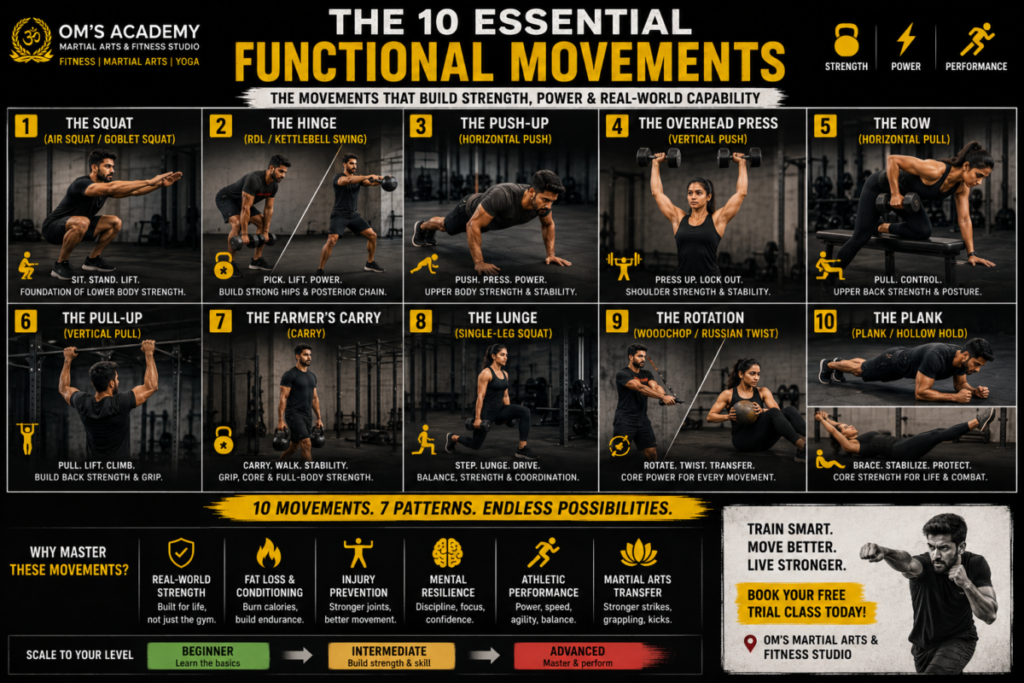
These 10 movements are the vocabulary of functional fitness. They cover every fundamental movement pattern your body uses in daily life, in sport, and in combat. Master these, and you can handle any physical challenge: lifting a suitcase, carrying a child, sprinting for a bus, throwing a punch, kicking a pad, or getting up from the floor.
At Om’s Martial Arts & Fitness Studio, every Functional Fitness session is built on these 10 movements. They are taught progressively, with modifications for every level, and integrated into the WODs (Workouts of the Day) that make up our programming.
[↑ Back to: The Complete Guide to Fitness]
The 7 Movement Patterns (Quick Review)
| Pattern | What It Does | Key Exercises |
|---|---|---|
| Squat | Hip + knee flexion under load | Air squat, goblet squat, front squat |
| Hinge | Hip-dominant bending | Deadlift, kettlebell swing, RDL |
| Push (horizontal) | Pushing away at chest height | Push-up, bench press, floor press |
| Push (vertical) | Pushing overhead | Overhead press, pike push-up, handstand push-up |
| Pull (horizontal) | Pulling toward at chest height | Row, ring row, pull-up (horizontal) |
| Pull (vertical) | Pulling from overhead | Pull-up, chin-up, lat pulldown |
| Carry / Rotate / Core | Moving under load, rotating, stabilizing | Farmer’s carry, woodchop, plank, hollow hold |
The 10 movements below cover all 7 patterns.
Movement 1: The Squat (Air Squat → Goblet Squat)
Pattern: Squat
Muscles: Quads, glutes, hamstrings, core, lower back
Real-life: Sitting down, standing up, lifting from the ground, kicking stability
Air Squat (Bodyweight)
Step-by-Step:
- Stand with feet shoulder-width apart. Toes slightly out (15-30°).
- Brace your core (imagine someone is about to punch your stomach).
- Push your hips back and bend your knees, as if sitting into a chair.
- Lower until your thighs are at least parallel to the floor (or deeper if mobility allows).
- Keep your chest up, your back flat, and your knees tracking over your toes (not collapsing inward).
- Drive through your heels and mid-foot to stand back up. Squeeze your glutes at the top.
Common Mistakes:
| Mistake | Correction |
|---|---|
| Knees caving inward | Push knees outward, tracking over the toes. |
| Heels lifting off the floor | Keep weight in the heels and mid-foot. Widen stance if needed. |
| Rounding the lower back | Brace the core. Keep the chest up. “Proud chest.” |
| Not going deep enough | Aim for thighs parallel (or below). Use a box to gauge depth. |
| Rising on toes | Drive through the whole foot, not just the toes. |
Goblet Squat (Weighted)
Step-by-Step:
- Hold a kettlebell or dumbbell at your chest (goblet position). Elbows tucked.
- Perform the air squat as above, with the weight at your chest.
- The weight acts as a counterbalance, helping you stay upright and go deeper.
Progression: Air squat → Goblet squat (light) → Goblet squat (heavy) → Front squat (barbell) → Back squat (barbell)
Regression (if mobility is limited): Box squat (sit onto a bench, then stand). Hold onto a pole or TRX for support.
Movement 2: The Hinge (Romanian Deadlift → Kettlebell Swing)
Pattern: Hinge
Muscles: Hamstrings, glutes, lower back, core, grip
Real-life: Picking up heavy objects, hip power for kicks and takedowns
Romanian Deadlift (RDL)
Step-by-Step:
- Stand with feet hip-width apart. Hold a barbell or dumbbells in front of your thighs.
- Push your hips back (hinge at the hips, not the waist). Keep a slight bend in the knees.
- Lower the weight along your thighs, keeping it close to your body.
- Go until you feel a deep stretch in your hamstrings (typically mid-shin level).
- Keep your back flat throughout. Do not round.
- Drive your hips forward to stand back up. Squeeze your glutes at the top.
Common Mistakes:
| Mistake | Correction |
|---|---|
| Rounding the back | Keep the back flat. Hinge at the hips, not the spine. |
| Bending the knees too much | This is a hip hinge, not a squat. Knees stay slightly bent. |
| Letting the weight drift away from the body | Keep the weight close to the thighs throughout. |
| Going too low (rounding the back) | Stop when you feel the hamstring stretch. Do not force range. |
Kettlebell Swing
Step-by-Step:
- Stand with feet shoulder-width apart. Kettlebell on the floor between your feet.
- Hinge at the hips and grab the kettlebell with both hands.
- Hike the kettlebell back between your legs (like a football snap).
- Drive your hips forward explosively (snap the hips). The kettlebell swings up to chest height.
- The arms are relaxed — the power comes from the hips, not the arms.
- Let the kettlebell fall back between your legs. Repeat.
Common Mistakes:
| Mistake | Correction |
|---|---|
| Using the arms to lift the kettlebell | The arms are ropes. The hips generate the power. |
| Squatting instead of hinging | The swing is a hinge, not a squat. Minimal knee bend. |
| Rounding the back | Brace the core. Flat back throughout. |
| Over-swinging (past shoulder height) | Stop at chest height. Do not swing overhead (unless doing an American swing). |
Progression: RDL (light) → RDL (heavy) → Kettlebell swing (light) → Kettlebell swing (heavy) → Single-leg RDL → Trap bar deadlift
Movement 3: The Push-Up (Horizontal Push)
Pattern: Push (horizontal)
Muscles: Chest, shoulders, triceps, core
Real-life: Pushing a door, a cart, an opponent. Getting up from the floor.
Step-by-Step:
- Start in a high plank position. Hands under shoulders. Fingers spread wide.
- Body in a straight line from head to heels. Core braced. Glutes squeezed.
- Lower your chest toward the floor by bending your elbows (elbows at 45° from the body, not flared to 90°).
- Lower until your chest is 1-2 inches from the floor (or your elbows reach 90°).
- Press back up to the starting position. Exhale on the way up.
Common Mistakes:
| Mistake | Correction |
|---|---|
| Hips sagging | Brace the core. Squeeze the glutes. One straight line. |
| Elbows flared to 90° | Tuck elbows to 45° from the body. Protects the shoulders. |
| Not going deep enough | Chest to 1-2 inches from the floor. Half reps = half results. |
| Head dropping or lifting | Keep the neck neutral. Look at the floor, not the wall. |
Progression: Wall push-up → Incline push-up (hands on bench) → Knee push-up → Full push-up → Weighted push-up → Archer push-up → One-arm push-up
Regression: Wall push-up. Incline push-up. Knee push-up.
Movement 4: The Overhead Press (Vertical Push)
Pattern: Push (vertical)
Muscles: Shoulders (deltoids), triceps, upper chest, core
Real-life: Lifting something overhead, pressing upward, martial arts (punching upward, clinch)
Step-by-Step (Dumbbell Overhead Press):
- Stand with feet shoulder-width apart. Hold dumbbells at shoulder height. Palms forward.
- Brace your core and squeeze your glutes (protects the lower back).
- Press the dumbbells straight overhead until your arms are fully extended.
- Lower back to shoulder height with control.
- Do not arch your lower back. If you must arch, the weight is too heavy.
Common Mistakes:
| Mistake | Correction |
|---|---|
| Arching the lower back | Brace the core. Squeeze the glutes. Reduce the weight. |
| Pressing the weight forward (not straight up) | Press straight overhead. The weight should end over your mid-foot. |
| Shrugging the shoulders | Keep the shoulders down and stable. Press with the deltoids and triceps. |
Progression: Seated dumbbell press → Standing dumbbell press → Standing barbell press → Push press → Handstand push-up (wall) → Freestanding handstand push-up
Movement 5: The Row (Horizontal Pull)
Pattern: Pull (horizontal)
Muscles: Upper back (rhomboids, traps), lats, biceps, rear deltoids, core
Real-life: Pulling a door, a rope, an opponent. Posture correction.
Step-by-Step (Dumbbell Row):
- Place one knee and one hand on a bench. Back flat. Core braced.
- Hold a dumbbell in the opposite hand. Arm extended.
- Pull the dumbbell toward your hip (not your chest). Squeeze your shoulder blade at the top.
- Lower with control. Do not rotate your torso.
- Complete all reps on one side, then switch.
Common Mistakes:
| Mistake | Correction |
|---|---|
| Pulling to the chest (not the hip) | Pull toward the hip / pocket. This engages the lats. |
| Rotating the torso | Keep the torso still. The movement is in the arm and shoulder blade. |
| Rounding the back | Keep the back flat. Brace the core. |
| Using momentum (jerking the weight) | Control the weight. Slow eccentric (lowering). |
Progression: Ring row (incline) → Dumbbell row → Barbell row → Pendlay row → Weighted pull-up (horizontal variation)
Movement 6: The Pull-Up (Vertical Pull)
Pattern: Pull (vertical)
Muscles: Lats, biceps, upper back, core, grip
Real-life: Climbing, pulling yourself up, grappling, cage wrestling
Step-by-Step:
- Hang from a pull-up bar with an overhand grip (palms facing away). Hands slightly wider than shoulders.
- Brace your core. Squeeze your glutes. Legs straight or crossed.
- Pull yourself up by driving your elbows down and back. Think “pull the bar to your chest.”
- Pull until your chin clears the bar.
- Lower with control to a full dead hang (arms fully extended).
Common Mistakes:
| Mistake | Correction |
|---|---|
| Kipping (swinging) | Strict pull-ups. No momentum. Control the movement. |
| Not going to full extension at the bottom | Lower to a full dead hang. Half reps = half results. |
| Pulling with the biceps only | Initiate with the lats (drive elbows down). The biceps assist. |
| Shrugging the shoulders | Keep the shoulders depressed (away from the ears). |
Progression: Dead hang (grip) → Scapular pull-ups → Band-assisted pull-ups → Negative pull-ups (lower slowly) → Full pull-ups → Weighted pull-ups → Muscle-ups
Regression: Dead hang. Band-assisted. Negative (jump up, lower slowly over 5 seconds).
Movement 7: The Farmer’s Carry (Carry)
Pattern: Carry
Muscles: Grip, forearms, shoulders, core, upper back, glutes, legs
Real-life: Carrying groceries, luggage, a child, a heavy box
Step-by-Step:
- Pick up two heavy dumbbells or kettlebells (one in each hand).
- Stand tall. Shoulders back. Core braced. Chest proud.
- Walk in a straight line for a set distance (20-40 meters) or time (30-60 seconds).
- Keep the weights at your sides. Do not let them swing.
- Walk with short, quick steps. Do not shuffle.
Common Mistakes:
| Mistake | Correction |
|---|---|
| Leaning to one side | Keep the torso upright and level. Equal weight in both hands. |
| Letting the shoulders shrug | Keep the shoulders down and back. |
| Rushing | Walk with controlled, deliberate steps. The carry is a stability exercise, not a race. |
Progression: Light carry → Heavy carry → Single-arm carry (suitcase carry) → Overhead carry → Waiter’s carry
Movement 8: The Lunge (Single-Leg Squat)
Pattern: Squat (unilateral)
Muscles: Quads, glutes, hamstrings, core, balance
Real-life: Walking, climbing stairs, kicking stability, sport-specific movement
Step-by-Step (Walking Lunge):
- Stand with feet hip-width apart. Hands on hips or holding dumbbells.
- Step forward with one leg (2-3 feet).
- Lower your hips until both knees are at 90°. The front knee tracks over the ankle. The back knee hovers just above the floor.
- Drive through the front heel to stand back up.
- Step forward with the other leg. Repeat.
Common Mistakes:
| Mistake | Correction |
|---|---|
| Front knee past the toes | Step farther forward. The knee should track over the ankle, not past the toes. |
| Torso leaning forward | Keep the torso upright. Chest proud. |
| Narrow base (feet in a straight line) | Step wide enough for stability. Feet should be hip-width apart, not on a tightrope. |
Progression: Split squat (static) → Walking lunge → Reverse lunge → Bulgarian split squat → Pistol squat (single-leg)
Movement 9: The Woodchop / Russian Twist (Rotation)
Pattern: Rotate
Muscles: Obliques, core, shoulders, hips
Real-life: Throwing, swinging, turning, martial arts (hooks, roundhouses, takedowns)
Step-by-Step (Cable / Band Woodchop):
- Attach a cable or band at shoulder height (or low for a low-to-high chop).
- Stand sideways to the anchor point. Feet shoulder-width apart. Knees slightly bent.
- Grab the handle with both hands. Arms extended.
- Rotate your torso (not just your arms) to pull the handle across your body and down (or up).
- Control the return. Do not let the weight pull you back.
- Complete all reps on one side, then switch.
Common Mistakes:
| Mistake | Correction |
|---|---|
| Rotating only the arms | The power comes from the torso rotation, not the arms. The arms are extensions of the core. |
| Hips not rotating | Allow the hips to rotate slightly with the torso. This is a full-body rotation. |
| Using momentum | Control the movement. Slow and deliberate. |
Alternative: Russian twist (seated, rotating a weight side to side), medicine ball throw (rotational throw against a wall).
Movement 10: The Plank / Hollow Hold (Core Stabilization)
Pattern: Core (anti-extension, anti-rotation)
Muscles: Rectus abdominis, transverse abdominis, obliques, shoulders, glutes
Real-life: Posture, spinal protection, force transfer (every punch, kick, and lift)
Step-by-Step (Plank):
- Start in a forearm plank position. Elbows under shoulders. Forearms on the floor.
- Body in a straight line from head to heels. Core braced. Glutes squeezed.
- Do not let the hips sag (extension) or pike (flexion).
- Breathe steadily. Hold for the prescribed time (30-90 seconds).
Step-by-Step (Hollow Hold):
- Lie on your back. Arms extended overhead. Legs extended.
- Press your lower back into the floor. Lift your shoulders and legs off the floor (6-12 inches).
- Your body forms a shallow banana shape. Only your lower back touches the floor.
- Hold for 20-60 seconds. Breathe.
Common Mistakes:
| Mistake | Correction |
|---|---|
| Hips sagging (plank) | Squeeze the glutes. Brace the core. “Pull your belly button to your spine.” |
| Hips piking (plank) | Lower the hips. One straight line. |
| Lower back arching (hollow hold) | Press the lower back into the floor. If it arches, raise your legs higher. |
| Holding the breath | Breathe steadily. The core must stabilize while breathing. |
Progression: Plank (30s) → Plank (60s) → Plank (90s) → Side plank → Plank with shoulder tap → Ab wheel rollout → Hollow hold → Hanging leg raise
The 10-Movement Warm-Up (Every Session)
At Om’s, every Functional Fitness session begins with a movement prep that covers all 10 patterns:
| Exercise | Reps | Pattern |
|---|---|---|
| Bodyweight squats | 10 | Squat |
| Kettlebell swings (light) | 10 | Hinge |
| Push-ups (or incline) | 8 | Push (horizontal) |
| Pike push-ups (or overhead press, light) | 8 | Push (vertical) |
| Ring rows (or dumbbell rows, light) | 8 | Pull (horizontal) |
| Band pull-aparts | 15 | Pull (horizontal / rear delts) |
| Walking lunges | 6/leg | Lunge |
| Farmer’s carry (light) | 20m | Carry |
| Russian twists | 10/side | Rotate |
| Plank | 30s | Core |
Total: ~8 minutes. This prepares every joint, muscle, and movement pattern for the session.
Frequently Asked Questions
Q: Do I need to master all 10 movements before I start?
A: No. You learn them progressively. Week 1: air squat, push-up (incline), plank. Week 4: goblet squat, full push-up, row. Week 12: kettlebell swing, pull-up (assisted), overhead press. Mastery takes months. Starting takes one class.
Q: Can I do these movements at home?
A: Yes. Most require minimal equipment (a pair of dumbbells, a kettlebell, a pull-up bar, a mat). However, in-person coaching (at Om’s) ensures correct form and progressive loading.
Q: How often should I practice these movements?
A: 3-5× per week. The movements are the foundation. Every session includes 4-6 of them. Consistency builds mastery.
Q: Are these movements safe for beginners?
A: Yes, with proper instruction. Every movement has a regression (easier variation) and a progression (harder variation). At Om’s, instructors scale every movement to your level.
Q: How do these movements help martial arts?
A: Squat → kicking stability. Hinge → hip power (kicks, takedowns). Push → punching power. Pull → grappling control. Carry → clinch strength. Rotate → hook and roundhouse power. Core → force transfer. Every movement transfers directly to combat performance.
[→ Full FAQ: 300+ Fitness Questions Answered]
Master the 10 Movements at Om’s
These 10 movements are the alphabet of functional fitness. Learn them, and you can build any workout. Master them, and you can handle any physical challenge life throws at you.
At Om’s Martial Arts & Fitness Studio, every Functional Fitness class is built on these movements — taught progressively, coached individually, and integrated into challenging, varied workouts.
[→ Book Your Free Functional Fitness Trial Class at Om’s Martial Arts & Fitness Studio]
[→ Read the Complete Guide to Fitness]
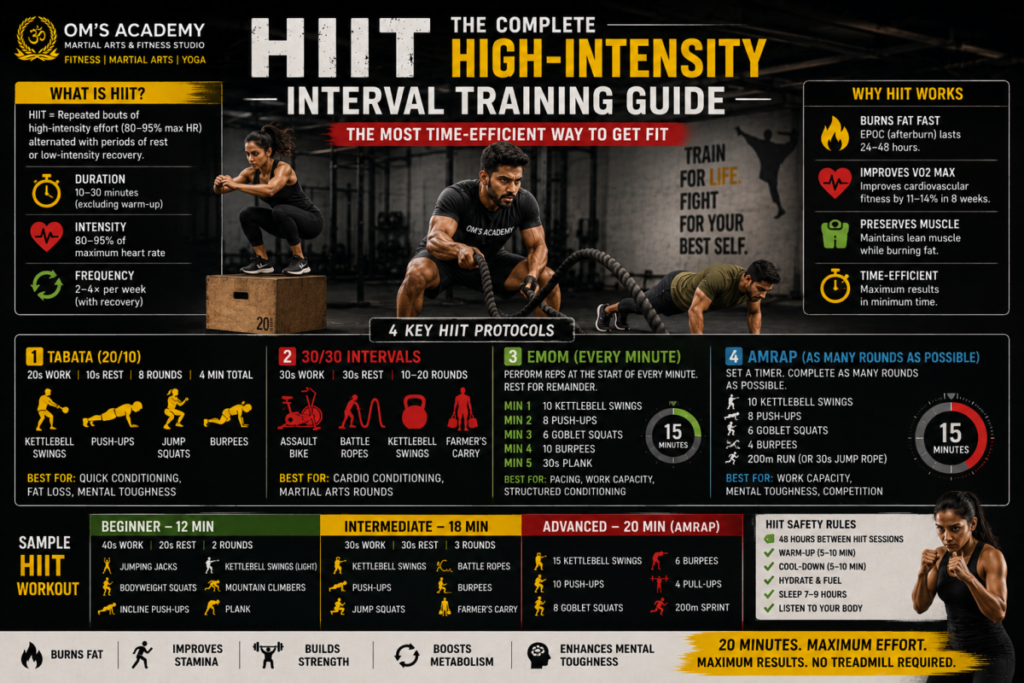
[→ Next: HIIT – The Complete High-Intensity Interval Training Guide]
Om’s Martial Arts & Fitness Studio – 10 movements. Infinite combinations. One body that works.